
raspberryPi3にnanoDLPをWANHAO Duplicator 7向けにインストールしていきます。
nanoDLP公式サイトと3dprinterwiki.infoを参考にしています。raspberryPi3は初期化済みを前提としています。
以下のコマンドをユーザーpiで実行します。
(wget https://www.nanodlp.com/nanodlp.tar.gz --no-check-certificate -O - | tar -C /home/pi -xz);cd /home/pi/printer;sudo ./setup.sh
実行するといくつか質問がありますが全て「y」キーで問題ありません。最後の質問で「raspi-config」が起動しますがESCキーを押して終了して下さい。そして再起動がかかりますので再度ログインし直します。
config.txtを編集します。
sudo nano /boot/config.txt
カーソルキーの下を押して「hdmi_pixel_encoding=2」の場所までスクロールし、「hdmi_pixel_encoding=2」と「gpu_mem=128」の先頭に#を追加します。
# Enable audio (loads snd_bcm2835)
dtparam=audio=on
disable_camera_led=1
#hdmi_pixel_encoding=2
start_x=1
#gpu_mem=128
disable_overscan= 1
dtparam=i2c1=on
そして、以下をコピーしてペーストします。
# DISPLAY SETTINGS
gpu_mem=192
hdmi_force_hotplug=1
hdmi_timings=1440 0 50 10 35 2560 0 4 2 2 0 0 0 50 0 198000000 0
hdmi_group=2
hdmi_mode=87
hdmi_pixel_freq_limit=500000000
hvs_priority=0x32ff
display_rotate=0x10000

max_framebuffer_width=1440
max_framebuffer_height=2560
framebuffer_width=1440
framebuffer_height=2560
framebuffer_depth=24
framebuffer_ignore_alpha=1
config_hdmi_boost=2
ctrlキーとxキーを押すと保存の可否を尋ねてくるのでyキーを押しすとファイル名を尋ねてくるので、Enterキーで保存します。
そして以下のコマンドで再起動します。
sudo reboot
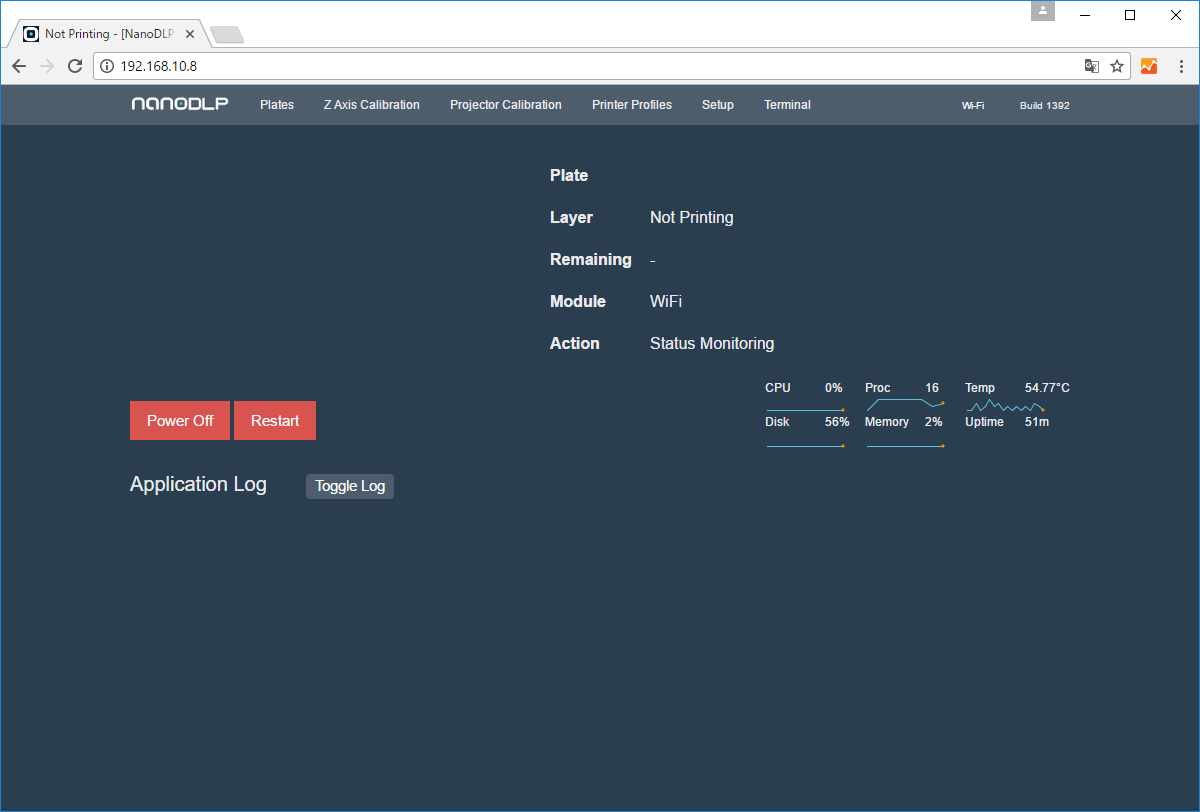
ブラウザを起動して、raspberryPi3のIPアドレスをアドレスバーに入力します。インストールに成功していれば以下の画面が表示されます。
以下の内容をコピペしてファイル名「MachineProfile.JSON」として保存します。
{
"ID": 1,
"Name": "NanoDLP D7",
"Port": 80,
"ZAxisPin": 0,
"DirectionPin": 10,
"LimitPin": 18,
"WaitPin": 0,
"EnablePin": 0,
"EnablePinState": 0,
"FaultPin": 0,
"FaultPinState": 0,
"ShutterPin": 11,
"ShutterType": 0,
"ShutterMode": 1,
"ShutterOpen": 500,
"ShutterClose": 2500,
"ShutterOpenGcode": "M106 S255\r\n[[GPIOHigh 26]]\r\n[[WaitForDoneMessage]]\r\n",
"ShutterCloseGcode": "M107\r\n[[GPIOLow 26]]\r\n[[WaitForDoneMessage]]\r\n",
"ShutterSignalLength": 1000,
"MaxSpeed": 3000,
"MinSpeed": 1000,
"StartupSpeed": 100,
"StopPositionMm": 10,
"ResinDistanceMm": 5,
"ZAxisHeight": 3000,
"MotorDegree": 1.8,
"MicroStep": 8,
"LeadscrewPitch": 8,
"LCDType": 1,
"LCDAdress": 56,
"ShieldType": 1,
"ShieldEncoding": 0,
"ShieldI2CAddress": 0,
"ShieldUSBAddress": "/dev/ttyACM0",
"ShieldSpeed": 115200,
"ShieldBootup": "M107",
"ShieldStart": "M107\r\n[[WaitForDoneMessage]]\r\nG90\r\n[[WaitForDoneMessage]]\r\nG28 F400\r\n[[WaitForDoneMessage]]\r\nG92 Z0\r\n[[WaitForDoneMessage]]\r\n[[PositionSet 0]]\r\nM17\r\n [[WaitForDoneMessage]]",
"ShieldResume": "",
"ShieldFinish": "M107\r\nG04 F30000\r\nG90\r\nG1 Z193 F300\r\nM84",
"ShieldAxisMode": 0,
"ShieldPositioning": 0,
"ManualMoveGcode": "G1 Z[[Position]]",
"SyscallStart": "",
"SyscallFinish": "",
"CameraFrequency": 0,
"CameraStore": 0,
"CameraCommand": "-w 1296 -h 972 --timeout 700 --awb sun",
"ShutdownPin": 7,
"ProjectorWidth": 1440,
"ProjectorHeight": 2560,
"ProjectorType": 0,
"ProjectorPowerCycle": 0,
"ProjectorSpeed": 9600,
"ProjectorAddress": "/dev/ttyUSB0",
"ProjectorOn": "* 0 IR 001",
"ProjectorOff": "* 0 IR 002",
"ProjectorLampQuery": "",
"ProjectorLampEffect": 0,
"ProjectorOnSyscall": "",
"ProjectorOffSyscall": "",
"ProjectorWarmup": 0,
"XYRes": 47.07,
"Username": "",
"Password": "",
"ViewUsername": "",
"ViewPassword": "",
"OnlineKey": "",
"Mute": 0,
"DisplayID": 0,
"DefaultProfile": 0,
"CustomValues": null,
"WifiType": "",
"WifiPass": "",
"WifiSSID": ""
}
画面メニューの「setup」=>「Tools」=>「ImportMachineSetting」を押して、「Restore Machine Settings」に保存したファイルを選択し、「Restore」ボタンを押すと、プリンター設定が読み込まれます。
以下の内容をコピペしてファイル名「PrinterProfiles1.JSON」として保存します。
{
"ProfileID": 1,
"Title": "D7 default 65micron",
"Desc": "",
"ZStepWait": 2000,
"SlowSectionHeight": 2,
"SlowSectionStepWait": 225,
"TopWait": 1,
"WaitHeight": 2,
"CureTime": 12,
"DynamicCureTime": "",
"DynamicSpeed": "",
"DynamicLift": "",
"Depth": 65,
"WaitBeforePrint": 0.8,
"WaitAfterPrint": 0.01,
"JumpHeight": 0,
"JumpPerLayer": 0,
"SupportTopWait": 3.3,
"SupportWaitHeight": 2.5,
"SupportLayerNumber": 5,
"SupportCureTime": 90,
"SupportDepth": 65,
"SupportWaitBeforePrint": 12,
"SupportWaitAfterPrint": 3,
"LowQualityCureTime": 12.6,
"LowQualitySkipPerLayer": 0,
"XYRes": 0,
"XYResPerc": 0,
"ZResPerc": 0,
"Color": "#ffffff",
"SyscallBeforeLayer": "",
"ShieldBeforeLayer": "G1 Z[[LayerPosition]] F[[ZSpeed]] P1 ; Move to layer position\r\n[[WaitForDoneMessage]]\r\nG4 P1\r\n[[WaitForDoneMessage]]",
"SyscallAfterLayer": "",
"ShieldAfterLayer": "[[Exec lcdmsg.py --msg=\"Lifting to {[[LayerPosition]]+[[ZLiftDistance]]}\" --line=2]]\r\nG1 Z{[[LayerPosition]]+[[ZLiftDistance]]} F{[[ZSpeed]]/3} P1 ; Lift to wait position\r\n[[WaitForDoneMessage]]\r\nG4 P1\r\n[[WaitForDoneMessage]]",
"PixelDiming": 0,
"DimAmount": 0,
"DimWall": 0,
"DimSkip": 0,
"IgnoreMask": 0,
"ShieldStart": "",
"ShieldResume": "",
"ShieldFinish": ""
}
以下の内容をコピペしてファイル名「PrinterProfiles2.JSON」として保存します。
{
"ProfileID": 2,
"Title": "D7 default 100micron",
"Desc": "",
"ZStepWait": 1500,
"SlowSectionHeight": 2,
"SlowSectionStepWait": 225,
"TopWait": 1,
"WaitHeight": 2,
"CureTime": 20,
"DynamicCureTime": "",
"DynamicSpeed": "",
"DynamicLift": "",
"Depth": 100,
"WaitBeforePrint": 0.8,
"WaitAfterPrint": 0.01,
"JumpHeight": 0,
"JumpPerLayer": 0,
"SupportTopWait": 3.3,
"SupportWaitHeight": 2.5,
"SupportLayerNumber": 5,
"SupportCureTime": 100,
"SupportDepth": 100,
"SupportWaitBeforePrint": 12,
"SupportWaitAfterPrint": 3,
"LowQualityCureTime": 12.6,
"LowQualitySkipPerLayer": 0,
"XYRes": 0,
"XYResPerc": 0,
"ZResPerc": 0,
"Color": "#ffffff",
"SyscallBeforeLayer": "",
"ShieldBeforeLayer": "G1 Z[[LayerPosition]] F[[ZSpeed]] P1 ; Move to layer position\r\n[[WaitForDoneMessage]]\r\nG4 P1\r\n[[WaitForDoneMessage]]",
"SyscallAfterLayer": "",
"ShieldAfterLayer": "G1 Z{[[LayerPosition]]+[[ZLiftDistance]]} F{[[ZSpeed]]/3} P1 ; Lift to wait position\r\n[[WaitForDoneMessage]]\r\nG4 P1\r\n[[WaitForDoneMessage]]",
"PixelDiming": 0,
"DimAmount": 0,
"DimWall": 0,
"DimSkip": 0,
"IgnoreMask": 0,
"ShieldStart": "",
"ShieldResume": "",
"ShieldFinish": ""
}
画面メニューの「Printer profile」を選択して、各プロファイルのDELETEボタンを押して消去します。「Import a Profile」ボタンを押して、Import Profileの参照に「PrinterProfiles1.JSON」を選択して「Import」ボタンを押すと読み込まれます。同様に「PrinterProfiles2.JSON」を読み込みます。
以上でnanoDLPをインストールと設定は完了です。